Thursday, March 31, 2011

Become a Domestic Goddess


My good friend Matney gave me this recipe and with this recipe she told me she had officially become domestic goddess. Now you might be wondering what is so amazing about this recipe that someone would become a domestic goddess just by making it? First of all it is a bread recipe. If you have never tackled making yeast bread it can be kind of intimidating. Second it tastes SO good so it must be challenging right? You see that is the secret here. This bread is so easy to make and has such great results. To top it all off you can even store some of the dough in the fridge for up to 2 weeks and use it as you like. I am so glad my friend became a domestic goddess and decided to invite me a long. This recipe will be one I make over and over again!

Artisan Free Form Bread

3 cups lukewarm water
1 1/2 tbsp granulated yeast
1 1/2 tbsp coarse kosher or sea salt
6 1/2 cups unsifted, unbleached, all purpose white flour (I added a cup or two of white whole wheat flour)
Cornmeal for pizza peel

1. Heat the water to just a little warmer than body temperature (about 100 degrees Fahrenheit).

2. Add yeast and salt to water in a 5-quart bowl or preferably, in a resealable, lidded container (not airtight - use container with gasket or lift a corner). Don't worry about getting it all to dissolve.

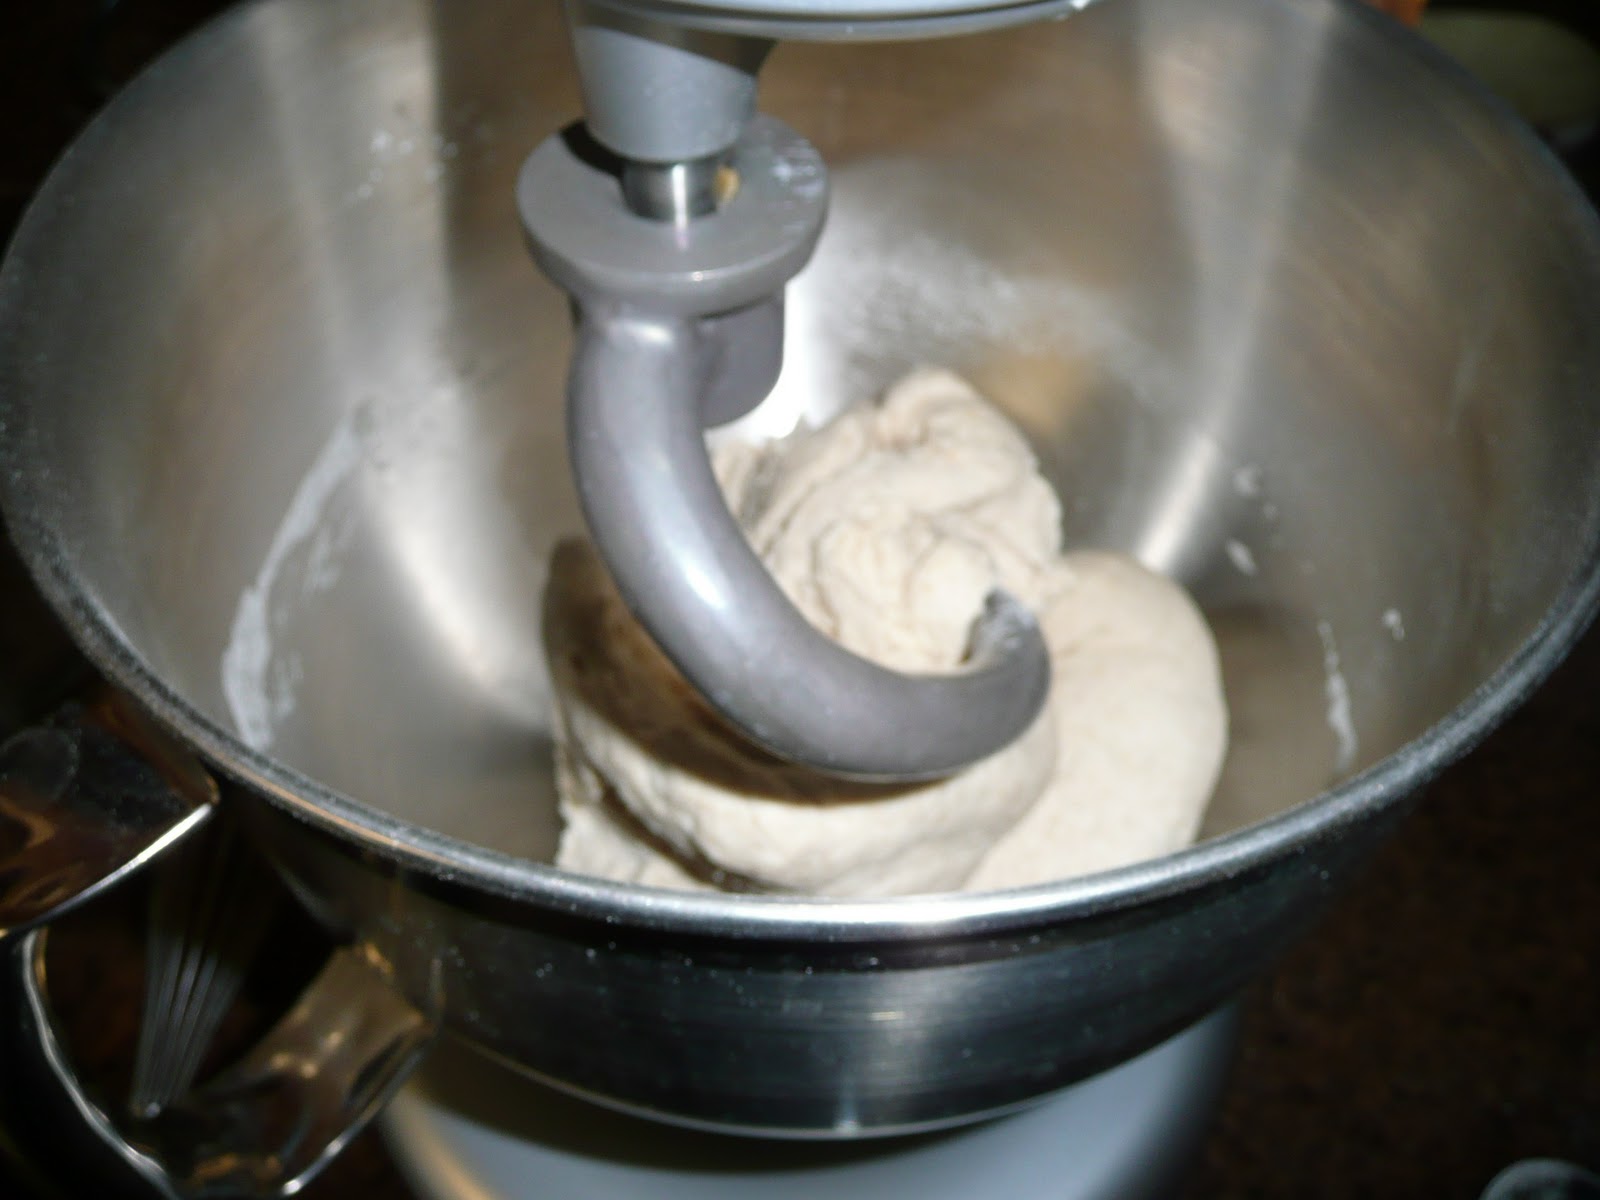
3. Mix in the flour by gently scooping it up, then leveling the top of the measuring cup with a knife; don't pad down. Mix with a wooden spoon or a high capacity food processor with a dough attachment or a heavy duty stand mixer with a dough hook, until uniformly moist. If hand-mixing becomes too difficult, use very whet hands to press together. Don't knead! This step is done in a matter of minutes and yields a wet dough loose enough to conform to the container.

4. Cover loosely. Do not use screw topped jars, which could explode from trapped gases. Allow the mixture to rise at room temperature until it begins to collapse (or at least flatten on top), approximately two hours, depending on temperature. Longer rising times, up to about five hours will not harm the result. You can use a portion of the dough any time after this period. Refrigerated wet dough is less sticky and easier to work with than room-temperature dough. I recommend refrigerating the dough at least three hours before shaping a loaf. And relax! You don't need to monitor doubling or tripling of volume as in traditional recipes.

On Baking Day

5. Prepare a pizza peel by sprinkling it (or a cutting board or cookie sheet without edges) liberally with cornmeal to prevent loaf from sticking to it when you slit it into the oven.
Sprinkle the surface of the dough with flour then cut off a 1-pound (grapefruit sized) piece with a serrated knife. Hold the mass of dough in your hands and add a little more flour as needed so it won't stick to your hands. Gently stretch the surface of the dough around to the bottom of four "sides," rotating the ball a quarter-turn as you go, until the bottom is a collection of four bunched end. Most of the dusting flour will fall off; it doesn't need to be incorporated. The bottom of the loaf will flatten out during resting and baking.

6. Place the ball on the pizza peel. Let it rest uncovered for about 40 minutes. Depending on the dough's age, you may see little rise during this period; more rising will occur during baking.

7. Twenty minutes before baking preheat oven to 450 degrees with a baking stone on the middle rack. Place an empty broiler tray for holding water on another shelf.

8. Dust the top of the loaf liberally with flour, which will allow the slashing, serrated knife to pass without sticking. Slash a 1/4-inch-deep cross, scallop or tick-tack-toe patter into the top. (This helps the bread expand during baking.)

9. With a forward jerking motion of the wrist, slide the loaf off the pizza peel and onto the baking stone. Quickly but carefully pour about a cup of hot water into the broiler tray and close the oven door to trap the steam. Bake for about 30 minutes, or until the crust is browned and firm to the touch. With wet dough, there's little risk of drying out the interior, despite the dark crust.  Allow to cool completely, preferably on a wire rack, for best flavor, texture and slicing. The perfect crust may initially soften, but will firm up again when cooled.

10. Refrigerate the remaining dough in your lidded (not airtight) container and use it over the next two weeks. You will find that even one day's storage improved the flavor and texture of your bread. This maturation continues over the two week period. Cut off and shape loaves as you need them. The dough can also be frozen in 1 pound portions in an airtight container and defrosted overnight in the refrigerator prior to baking day.


Wednesday, March 30, 2011

Sweet Potato Fries

We had some friends over a few weeks ago to grill some steaks (my husbands specialty). Our good friend Mary brought over some homemade sweet potato fries that were to die for! We have been craving them ever since that night. I even tried a different recipe but it just wasn't quite the same. I finally called her and made her tell me exactly what she does. Come to find out they are really quite easy to make. I hope you enjoy them as much as we did.

Sweet Potato Fries

3-4 sweet potatoes or yams
Mccormick's Grill Mates Steak Seasoning
Olive Oil

Clean the potatoes well. Slice into strips. Try and keep most of the fries a consistent size for more even baking. Place sliced fries on a baking sheet. Brush with olive oil. Sprinkle with steak seasoning. Bake in a 400 degree oven for about 30 minutes or until fries are done. Turn fries during baking as needed to maintain even baking and prevent burning. Enjoy!


We really enjoyed dipping ours in ranch dressing!

Buttermilk Ranch Dressing

We needed some ranch the other day so of course like the typical person we went to the store and bought some. We even  bought one that was from a good brand thinking that it would be good. What we realized is that store bought ranch is nothing like restaurant ranch. All I wanted was a simple creamy flavor. I have made the packets at home before and those are pretty good (better than store bought) and then I started searching for recipes online. I didn't really use any one recipe and kinda just made it all up, but the results were pretty good and it was so simple to make.

Homemade Buttermilk Ranch

1 cup mayo
1/2 cup buttermilk
1/2 tsp garlic powder
1/2 tsp parsley flakes
1/8 tsp salt
1/8 tsp season salt
1/8 tsp pepper

Mix all the ingredients together in a bowl. Enjoy with salad, veggies, sweet potato fries, or really anything you would enjoy ranch on.

Tuesday, March 29, 2011

Favorite Rolls


This recipe right here is the reason I started this blog. Whenever I make rolls I try new recipes, add new ingredients, and then never remember what I do from one roll baking experience to the next. I made these rolls and my husband said "these need to go on the blog!" I got the recipe from my Lion House cookbook (which I love by the way) and then made my own little changes. I hope you enjoy them as much as we do.

Dinner Rolls


*Makes about 2 dozen rolls

2 tablespoons instant yeast
2 cups warm water
1/3 cup honey
1/3 cup butter, softened
1 egg
2 1/2 teaspoons salt
2/3 cup nonfat dry milk
2 cups white whole wheat flour
3-4 cups unbleached flour

In a large bowl, combine the yeast and water. Let stand 5 minutes (no need to do this if using instant yeast – just add the yeast and water together with the other ingredients). Add honey, butter, salt, dry milk, 2 cups flour and egg. Beat together until very smooth. Add remaining flour gradually (about 1/2 cup at a time) until a soft but not sticky dough is formed. Knead the dough for at least five minutes if using an electric mixer and for at least 10 minutes if mixing the dough by hand.

Scrape dough off sides of bowl and pour about 1 tablespoon of oil all around sides of bowl. Turn dough over in bowl so it is covered with oil. (This helps prevent dough from drying out.) Cover with plastic wrap and allow to rise in warm place until doubled in size, about 1 1/2 hours.  Sprinkle cutting board or counter with flour and place dough on floured surface. Roll out and shape as desired. Place on greased or parchment lined baking pans. Cover lightly with plastic wrap. Let rise in warm place until rolls are doubled in size, about 1 to 1 1/2 hours.

Bake at 375 degrees for 15 to 20 minutes, or until golden brown. Brush with melted butter while hot.


Enjoy!!!


*Here is a description of how I like to make my rolls taken from one of my favorite sites. She also has great pictures of here process so click here to check her out.

Separate the dough into two portions. Roll each section out to an 11X14-inch rectangle. Brush the top with melted butter. Using a pizza cutter or sharp knife, cut the dough into two pieces, the long way (see photos below). Then slice the dough into five or six strips across so you end up with 10 to 12 small rectangles. Roll each small rectangle up like a snail and place on a silpat-lined or lightly greased baking sheet with the roll resting on it’s open edge. Repeat with the second portion of dough.
Cover the rolls with lightly greased plastic wrap and let them rise until doubled. Bake at 375 degrees for 12-14 minutes until they are nicely browned.

Monday, March 28, 2011

Smoked Salmon

In my opinion there is no better way to cook salmon than to smoke it. It ads such a rich yummy flavor that you just can't beat. It also takes away some of the fishiness that some salmon has. We have had smoked salmon several times in the last few months with different marinades or toppings but this is probably our favorite.


Smoked Salmon

1 cube butter
1 cup brown sugar
1/4 cup teriyaki  sauce
1/4 cup water
1-2 cloves garlic
salmon fillets (we just got a huge one from Costco, but I'm sure any size would work)


Melt the butter. Add the garlic. Mix in the brown sugar then add the teriyaki sauce and water. Place salmon fillets in a pan or a bowl. Pour mixture over salmon. Cover and let marinade in the fridge for a few hours or until you are ready to cook. Take salmon out of pan and place in smoker (I'm sure you could use this recipe on a grill as well) cook until salmon is done and flakes easily but isn't too dry. If you are using a smoker the slower you smoke the meat the better flavor the meat will have. We like to smoke ours for at least an hour but you could smoke it for even longer if you have the time.

*Note - As I mentioned above we used a huge salmon fillet and this recipe covered it generously so feel free to use less if you are making a smaller amount of salmon.

Asparagus

I have always loved asparagus. We used to eat frequently while growing up. My family would always steam it and then eat it with lemon juice. Although I do enjoy this way of eating it I have found a way that I like even more!

Garlic Asparagus

1 bundle asparagus
garlic salt
olive oil

Wash asparagus. Break off the hard ends of the asparagus. If you haven't done this before all you do is hold the middle of the asparagus and put pressure on the bottom part of it the tough end will snap off very easily. Spread asparagus out on a baking sheet. Drizzle olive oil over asparagus. Sprinkle garlic salt over the asparagus. Bake in a 400 degree oven for about 30 minutes or until the asparagus is tender (we like ours on the more tender side). I will usually rotate the asparagus a couple of times during the baking process for more even baking and to prevent burning.

Wednesday, March 23, 2011

Morning Buns

I found this recipe from one of my favorite food sites. I have kept these yummy little dough balls in the freezer and pull a few out whenever we want to eat something yummy and sweet for breakfast. I of course had to add a few of my own changes but they are great with or without the changes I have made.

Morning Buns


3 1/2 cups (14 3/4 ounces) fresh ground white whole wheat flour + 1/2 cup (2 1/4 ounces) cornstarch
1 tablespoon baking powder
1 1/4 teaspoons salt
2 tablespoons (7/8 ounce) sugar
2 to 2 1/4 cups heavy cream

Coating
7 tablespoons butter, melted, OR 2 5/8 ounces milk
Cinnamon and sugar for rolling (I just mixed my own together)

Line a 9' X 13" pan with tin foil, and grease the tin foil lightly. Tin foil isn’t absolutely necessary, but it makes it easier to get the bubbly, sugary buns out of the pan once they’re baked and also makes the clean up so much easier.

Whisk together the flour, baking powder, salt, and sugar. Add 2 cups of the cream all at once, then toss and stir the mixture till the dough comes together. If necessary, add additional cream to make the dough cohesive. Gather the dough in your hands and knead it a few times to make sure there are no dry spots. I mixed all of mine in my kitchen aid mixer with the dough attachment and it worked great.

Place the cinnamon sugar in a small, shallow bowl or pan; or in a plastic zip-top bag. Break off pieces of dough about the size of a ping pong ball, or about 1 1/8 ounces. Dip each piece in melted butter or milk, then roll or shake in the cinnamon-sugar to coat. Place the cinnamon-coated dough balls into the pan of your choice in a single layer; they’ll be touching one another, which is just fine.


Cover the pan with plastic, and place in the freezer overnight, or for up to a week or so. If freezing longer than overnight wrap the entire pan in plastic wrap, then in foil. I will also let the freeze in the pan then take them out and put them all in a zip lock freezer bag that way I can pull just a few out at a time and bake them.

Next day, remove the pan from the freezer, and let the buns rest at room temperature while you preheat your oven to 350°F. The buns don’t need to thaw.

If you’re baking the buns immediately (not frozen), bake them for 45 to 50 minutes, till the buns in the center are cooked through. You can asses this by taking a toothpick and actually digging into the center bun to take a look; it should look totally baked, not doughy. If the buns have been frozen, bake them for 65 to 70 minutes, testing for doneness as instructed above. Tent them with aluminum foil after 45 minutes of baking.

Remove from the oven, and serve immediately. Dust with confectioners’ sugar, if desired, right before serving.


Note # 1 - If you want to make these even less healthy (but oh so yummy)  pour a little bit of cream over the frozen dough right before baking and sprinkle with extra cinnamon sugar. This makes an ooey gooey sauce that bakes around them.

Note # 2 - If you want to make these healthier you can substitute honey for the sugar in the dough and use xylitol in the cinnamon sugar mixture instead of the sugar. I did this the last time I made these and they still turned out really good.

Click here to view original recipe

Tuesday, March 22, 2011

Welcome

I know I know food blogs are the big thing right now, so why wouldn't I want to start one of my own? The real reason behind this blog is that my husband tells me that I never use the same recipe twice. I will be in the mood for some type of food, I will search the internet to find the "best" recipe, I will make it and then never remember where I found the recipe. This blog really is just to help me so I can post my favorite recipes on here so I can make them over and over again.

Chocolate Creme Brulee

Who doesn't love creme brulee right? So how could you go wrong with a chocolate creme brulee? I stumbled upon this recipe one day as I was searching my favorite food sites for some yummy treat. It really lives up to everything you would expect from the name and so worth every calorie!

Chocolate Creme Brulee

1 1/4  ounces bittersweet chocolate
3 egg yolks
¼ cup + 2 teaspoons sugar, divided
½ cup heavy cream
Preheat the oven to 300°.  Bring a large pot of water to a boil for a water bath to cook the custards.  In a double boiler over low heat, melt the chocolate.  Or, melt in 20 second pulses in the microwave on low, stirring frequently.  Set aside to cool slightly.  In a medium bowl, whisk together by hand the egg yolks and sugar.  Once well incorporated, add the heavy cream.  Pour in the melted chocolate mixture.  Divide the mixture between two 6-ounce ramekins.  Place the ramekins in a small baking dish and add the hot water until it comes up ½ way on the sides of ramekins.  Move the baking dish carefully to the oven and bake about 40-44 minutes, until the custard is set.  The middle will slightly jiggle, but the sides will be set.  Let the custards cool in the water bath completely before removing them.  Cover each ramekin with plastic wrap and chill at least 5 hours or until ready to serve (can be made up to 2 days in advance).  Before serving, sprinkle 1 teaspoon of sugar over each and brulee with a kitchen torch until the sugar caramelizes and hardens.  Serve immediately.

I forgot to take a picture of the final product before we devoured it, so this is a close to the end as I can get :).


Click here for original recipe (and her pictures are far better than mine)

Bagels

I have always loved bagels. Bagels to me have always seemed a little challenging. I finally decided to tackle this baking challenge and see what happens. What I found out is that bagels aren't as hard as I always thought they were. Enjoy!

Homemade Bagels 

Starter
1/2 cup (2 ounces) unbleached bread flour
1/4 cup (2 ounces) cool water
pinch of instant yeast (I used active-dry yeast and it worked great)
Dough
4 cups (17 ounces) unbleached bread flour (I used half white and half whole wheat four)
1 1/4 cups (10 ounces) cool water
1 3/4 teaspoons salt
1 1/2 teaspoons instant yeast (again, I used active-dry yeast and it worked great)
Water bath
water to fill a 10″-diameter pan about 1″ deep
1 tablespoon non-diastatic malt powder or brown sugar (I used brown sugar)

Topping
Asiago Cheese
 
Combine the starter ingredients in a medium-sized bowl, cover, and let rest at room temperature overnight.
Next day, combine the puffy starter with all of the dough ingredients and knead—by hand, electric mixer, or bread machine—to form a stiff but not dry dough. Since we’re using a high-protein bread flour here, you might notice it takes a bit more effort and time to develop the gluten. Place the dough in a lightly greased bowl or large (at least 8-cup) measuring cup, cover, and set it aside to rise for 1 hour. Gently deflate the dough, and let it rise for another 30 minutes.
Transfer the dough to a work surface, and divide it into 12 pieces. (I divided the dough into 10 pieces since I like my bagels a tad big larger.) Roll each piece into a smooth, round ball. Cover the balls with plastic wrap, and let them rest for 30 minutes. They’ll puff up very slightly.
While the dough is resting, prepare the water bath by heating the water and malt (or sugar) to a very gentle boil in a wide-diameter (about 10″) pan. A 10″ electric frying pan works well here. Preheat your oven to 425°F.
Use your index finger to poke a hole through the center of each ball, then twirl the dough on your finger to stretch the hole till it’s about 2 inches in diameter (the entire bagel will be about 3 ½” across). (Again, mine were a bit larger than this.) Place each bagel on a lightly greased or parchment-lined baking sheet, and repeat with the remaining pieces of dough.
Transfer the bagels, four at a time if possible, to the simmering water. Increase the heat under the pan to bring the water back up to a gently simmering boil, if necessary. Cook the bagels for 2 minutes, flip them over, and cook 1 minute more. Using a skimmer or strainer, or the end of a wooden spoon, remove the bagels from the water and place them back on the baking sheet. Repeat with the remaining bagels.


Bake the bagels for about 25 minutes, or until they’re as deep brown as you like.
To top with cheese, remove them from the oven after about 15 minutes, spray with water, and sprinkle with cheese. Return to the oven to finish baking. Remove the bagels from the oven, and cool completely on a rack.
 
Yield: 1 dozen chewy bagels.


Recipe slightly adapted from here

Chocolate Pudding


For Valentines day this year my husband insisted on making dinner. I talked him into letting me make dessert. Of course since it was Valentines day I had to make something chocolate. I found this delicious recipe from here and let me just tell you it is the BEST chocolate pudding I have ever had! It is silky, smooth, and chocolaty. It is everything chocolate pudding should be!

Homemade Chocolate Pudding

*Makes about 4 cups of pudding

1/4 cup packed light brown sugar
3 tablespoons unsweetened cocoa powder (Dutch-process or regular)
3 tablespoons cornstarch
1/4 teaspoon salt
2 3/4 cups whole milk
1/4 cup heavy cream
1 cup milk chocolate chips (or 6 ounces bar milk chocolate chopped)
1/2 teaspoon vanilla extract

In a large saucepan, combine the brown sugar, cocoa, cornstarch and salt, whisking lightly. Whisk in the milk and cream to the sugar mixture until it is smooth. Stir in the chocolate chips and bring the mixture to a simmer over medium heat, whisking or stirring occasionally. Once the mixture is at a simmer, reduce the heat to medium-low and cook, whisking constantly, until the mixture is thickened and large bubbles pop at the surface, 2 to 3 minutes. Take the pot off the heat and stir in the vanilla.
Transfer the pudding to a large bowl and cover with plastic wrap, pressing the plastic wrap directly onto the surface of the pudding to avoid a skin starting to form. Refrigerate the pudding until it is completely cool, at least 4 hours but up to 3 days, if it is stored in an airtight container. Serve with a dollop of whipped cream…or not.

Chocolate Nibs

I went on a chocolate kick recently and found these chocolate nibs. Once I bought them I had no idea what to do with them. I found this recipe online and it was a really yummy little treat. My husband absolutely loved them (he is a huge chocolate lover).


Candied Cocao Nibs
Ingredients:
  • 3 ounces cacao nibs
  • 1/4 cup sugar
  • 1/2 tsp butter, softened
Preparation:
1. Prepare a baking sheet by lining it with parchment paper. Place the butter on a dish or slip of parchment near the stove.
2. Place the nibs and the sugar in a small saucepan and heat them over medium heat, stirring constantly with a wooden spoon. Soon the sugar will start to stick together and form larger clumps. It is normal for the mixture to give off a little smoke during the cooking process.
3. Cook the mixture, stirring constantly, until the sugar liquefies and there are only a few specks of unincorporated sugar. Remove the saucepan from the heat and add the butter immediately, stirring well.
4. Scrape the candied nibs onto the prepared baking sheet, separating them as much as possible. Allow them to cool at room temperature before breaking them apart by hand. Store in a dry Ziploc bag or airtight container. Do not refrigerate.

Monday, March 21, 2011

Coconut Oil Kettle Corn

I hate to admit this but I spend over an hour this morning reading about the health benefits of coconut oil. Let me tell you its pretty awesome. Now those of you who really know me might know that I don't like coconut. I don't really know what it is about shredded coconut, but I really don't like it. Anything that has coconut in it I shy away from. Spencer bought some coconut oil a while back and has been using it kinda as a lotion at times, and I have used it as an eye makeup remover (works great by the way). I hadn't ever really thought too much about eating it though. Yesterday I had a patient tell me about this green smoothie girl. I decided to look her up today which then somehow took me to coconut oil :).

I have decided that I'm going to start using more coconut oil in my baking. Most of you know that I really really love baking, and trying new recipes! Now when I get an idea in my head I have to do something about it....so I went out and bought some organic virgin unrefined coconut oil (supposedly this is the healthiest kind or something). I found a really yummy kettle corn recipe that I just found here.  I must say it is pretty good! I will keep you all updated as to how this coconut venture goes for me :).


Here is the recipe.


Kettle Corn
Over 3 batches air-popped popcorn in a brown paper bag or very large bowl, pour 1/3 cup agave nectar and 1/3 cup coconut oil. (Liquefy them together by warming double-boiler style submerged in hot tap water, in a heavy bowl or jar. Sprinkle mixture with 2 tsp. Original Himalayan Crystal Salt, and stir or shake well.

Now I didn't know what that type of salt was so I just used sea salt and I worked just fine.

Friday, March 18, 2011

Gnocchi

Most of you (all 3 of you that actually read this) know that I LOVE to bake. For me its a fun creative way to get yummy food to eat. Most of the time my creativity is limited to sweet treats. I think it is just because I enjoy eating those the most. I always enjoy trying new dinner recipes, but I dinners aren't nearly as fun for me to make as a yummy dessert. Well a few nights ago I found a recipe that looked so yummy. The first time I ever had gnocchi was at a restaurant called Ottavios in Provo. The restaurant is no longer there but I will always remember their gnocchi. Here is a brief refresher on gnocchi in case you don't know what it is. I had never mad gnocchi before, but I must say the results turned out pretty good. Let me also mention that there is very little about this recipe that is healthy, but I enjoyed all of the calories I got from it! Here is the yummy recipe just in case you want to take the time to make it.

Gnocchi Dough:

2 cups ricotta cheese
2 eggs
1 cup shredded Parmesan
1/2 tsp. salt
1/2 tsp. white pepper
1/4 tsp. nutmeg
2 cups flour (I used half whole wheat and half white flour)

Mix all the ingredients except flour together. Then, gradually add the flour. You may need less (I actually needed a lot more) depending on how big your eggs are. You want a soft, not too sticky dough. The dough is easier to work with if it's a little chilled, so take about 1/3 of the dough out and put the rest in the fridge until needed.
Roll out dough on a floured surface into a 1/2 inch thick rope. Then cute the rope into 1/2 inch long pieces. Then roll each piece on the back of a fork to give it ridges. That is just to help hold the sauce, so don't worry about perfection. Then line them all up on a pan, keeping them separate. Then place a piece of wax paper over top and begin another layer of gnocchi. Repeat until all of the dough is used. Cover the top with another piece of wax paper and place them in the fridge until ready to be boiled.

Sauce:

1/2 cup butter
2 ounces of prosciutto, chopped
10 torn basil leaves
1/4 cup pine nuts
1 cup cream
1/2 cup shredded Parmesan

Beat 1/2 cup of cream until whipped, set aside. Melt butter in a sauce pan, add pine nuts and cook until the nuts begin to brown. (While waiting, begin boiling a pot of water for the gnocchi.) Add 1/2 cup cream (not the whipped 1/2 cup of cream, but the other normal 1/2 cup of the cream) to the butter and pine nuts and bring to a light boil. Cook for one minute, then turn the heat down to low. Add basil and prosciutto. Then fold in the whipped cream and the Parmesan.
Add the gnocchi to the boiling water. Once they float, they are done. (It happens quickly.) Remove and mix with sauce. Serve immediately.
*Notes: I didn't have fresh basil or prosciutto so I used dried basil and bacon. I'm sure the recipe is even better with the fresh basil and prosciutto but I still thought it was fantastic without them. Also remember that the sauce will separate upon reheating so enjoy it the first day when it looks all pretty. I took some for leftovers and it still tasted amazing, but didn't look nearly as good. One last change I made was that I didn't have ricotta cheese so I substituted some cottage cheese that needed to be used.
The only thing I didn't like about this recipe was the time it took to roll the gnocchi. It wasn't horrible but it was a slightly tedious process. In the end you do end up with a lot of the gnocchi. I cooked about half of it and froze the other half so I can make this again soon :). My pictures aren't that amazing but feel free to take a peak at the site I found this recipe on to see her pictures.


Here is my dough (yes I mix/knead all my dough in my kitchen aid mixer and LOVE it!!)


I let my dough sit for a little while. It made it much easier to manage.


This is the process that took some time, the rolling out, cutting, and shaping steps in the recipe


MMMM the sauce! I know its so unhealthy but sooo good!


Once you put the gnocchi in the boiling water it really only took a few minutes for them all to be floating

This is the hubby giving his thumbs up in approval of this dish :).