Showing posts with label Dessert. Show all posts

Wednesday, September 11, 2024

Biscoff Carmelitas

Biscoff Carmelitas

Carmelitas aka caramel cookie bars are my newest obsession! We had them at my sister in law's and I knew I had to make them again and make them my own. If you know me you know that in my world biscoff makes everything better. If you are looking for a unique twist on a classic treat or crowd pleasing dessert this combination promises to be a hit! 

I make the caramel layer from scratch. It is so good and easy, but if you don't want to make a homemade caramel you are welcome to just use a bottle of caramel sauce. I personally think the homemade caramel is 100% worth it!

Biscoff Carmelitas

Base/Topping Layer

1 cup butter softened

1 cup plus 2 tbs brown sugar

1 1/2 cups all purpose flour

1 1/2 cups oats

1/2 tsp salt

1 tsp baking soda

1 bag milk chocolate chips

1 cup biscoff spread

Butterscotch Caramel Layer

1 cup packed brown sugar

3/4 cup heavy cream

1/2 cup butter (I use salted)

1/4 tsp salt

1/2 tsp vanilla extract

Instructions:

Preheat oven to 350º. Lightly grease a 9X13 pan

For the base layer: Combine the first 6 ingredients (butter, brown sugar, flour, oats, salt, and baking soda) in a stand mixer and mix just until combined. Take out 1/4 of the mister and save for later. This will be your topping. Press the remaining 3/4 of the mixture into the prepared 9X13 pan. (I usually press it first with my hands and then roll it smooth with a small rolling pin) Bake at 350º for 10-12 minutes. While that bakes make your caramel.

Caramel Sauce: In a medium sauce pan add the brown sugar, heavy cream, butter and salt. Cook over medium low heat until the butter is melted, stirring occasionally. Once the butter is melted increase the heat to medium. Bring mixture to a simmer and cook for 3-4 minutes stirring constantly. Take off heat and stir in vanilla.

Once the base layer is cooked remove from the over. Spred  biscoff over the base layer. I find it is easier if I warm up my biscoff and just pour it over the base. I then spread it out to evenly cover the base. Once my biscoff is in place I pour my prepared caramel over the biscoff. I don't alway use the whole recipe of caramel. Just pour it until it seems to cover the pan. The caramel is delicious so any extra should be eaten over ice cream or just by the spoonful. Now take your chocolate chips and sprinkle them on top of the caramel layer. Now take the saved base/topping and sprinkle it over the chocolate chips. Bake for another 10-12 minutes at 350º. Let cool before cutting and enjoy!

I give credit to Mel's Kitchen Cafe for the amazing Caramel Recipe!

Monday, October 1, 2012

Biscoff Bars With White Chocolate Biscoff Drizzle

Hello friends! Its been a while. I sort of went on a blogging hiatus. I just can't believe that summer has flown by and that we are already well into fall. I do love fall. I love all the fall colors and the slightly cooler weather. My newest favorite thing about fall is probably these bars (mostly because I made them today). These bars are very similar to peanut butter bars (one of my favorite things in life) but instead of peanut butter you get a delightful caramelly/cinnamony flavor that is oh so good! I am slightly obsessed with Biscoff spread all though I do feel that my obsession has died down a little. I hope all of you enjoy these as much as we do!


Biscoff Bars


Ingredients:

3/4 c butter
1/2 c sugar
1/2 c brown sugar (dark brown sugar if possible)
3/4 c Biscoff Spread
2 eggs
1 tsp vanilla
1 tsp cinnamon
3/4 tsp baking soda
1/2 tsp salt
1 1/2 c flour
1 1/2 c oats
3/4 c Biscoff Spread

White Chocolate Biscoff Drizzle
1/2 cup white chocolate
2 tbs Biscoff Spread

Cream together the butter and sugars. Add Biscoff Spread, eggs, and vanilla and beat until smooth. In a separate bowl combine dry ingredients. Add dry ingredients and mix until a firm dough is made. Grease a cookie sheet (or line with foil) and spread mixture in the pan. Bake at 325 degrees for 15 minutes or until golden. Remove from the oven and let set for a few minutes. While bars are still warm spread on the extra 3/4 cup Biscoff Spread. The warmth of the bars helps the Biscoff spread easier. The extra 3/4 cup Biscoff spread for the top is an approximation use less or more according to you own personal Biscoff desires. Allow bars to cool completely. In a microwave safe bowl place white chocolate and Biscoff spread. Microwave in 30 second intervals, stirring after each 30 seconds until chocolate is melted. Drizzle white chocolate mixture over cooled Biscoff bars. Cut into squares and enjoy!

Monday, August 13, 2012

Texas Sheet Cake

I honestly am not the hugest fan of most cakes. Store bought cakes just don't appeal to me. If I'm going to eat a cake it better be moist, rich, and have a very fantastic frosting. This is why I love Texas Sheet Cake! This cake is moist and delicious with a fudge type frosting poured all over the top of it! I also love it because it is great for larger groups because it makes a ton!


Texas Sheet Cake

Ingredients

2 cups all-purpose flour
2 cups white sugar
1 teaspoon baking soda
1/2 teaspoon salt
1/2 cup sour cream (if you don't have sour cream plain yogurt works well too)
2 eggs
1 cup butter
1 cup water
5 tablespoons unsweetened cocoa powder

6 tablespoons milk
5 tablespoons unsweetened cocoa powder
1/2 cup butter
4 cups powdered sugar
1 teaspoon vanilla extract
1 cup chopped walnuts (optional)

Directions
Preheat oven to 350 degrees F (175 degrees C). Grease and flour a 10x15 inch pan.

Combine the flour, sugar, baking soda and salt. Beat in the sour cream and eggs. Set aside. Melt the butter on low in a saucepan, add the water and 5 tablespoons cocoa. Bring mixture to a boil then remove from heat. Allow to cool slightly, then stir cocoa mixture into the egg mixture, mixing until blended.

Pour batter into prepared pan. Bake in the preheated oven for 20 minutes, or until a toothpick inserted into the center comes out clean.

For the icing: In a large saucepan, combine the milk, 5 tablespoons cocoa and 1/2 cup butter. Bring to a boil, then remove from heat. Stir in the confectioners' sugar and vanilla, then fold in the nuts, mixing until blended. Spread frosting over warm cake.


Recipe Source: Allrecipes

Sunday, July 15, 2012

Lemon Bars

Besides good old chocolate chip cookies and boxed brownies lemon bars were probably the first dessert I made on a regular basis. I think I started making them when I was in high school. I have a deep love for citrus which I often forget. Then I make some citrus dessert again and I remember. Don't tell my husband (the chocolate fanatic) but sometimes I think I might take a lemon bar over something chocolatey. I absolutely love the refreshing taste and the slight tang that goes with them. I saw a recipe a while back that called for using an entire lemon (peel and all) in the lemon bars. I already have a delicious recipe for lemon bars so I kind of disregarded it, but ever since that day I have had this desire to use an entire lemon in my lemon bars. Well this time I decided that I was going to try it! I didn't remember the site that I first saw the recipe, but I found one that also used a whole lemon. I kind of took what he did and combined it with the recipe I already had. The result was a tangy, lemony, almost perfect lemon bar. I don't think there is anything I would change. These lemon bars aren't for the mild lemon bar lover. These are real lemon bars and will knock your socks off!


Lemon Bars
One 9X13-inch pan

Crust
2 cup flour
1/2 cup powdered sugar
1/2 teaspoon salt
14  tablespoons melted butter

Lemon Topping
1 lemon, organic or unsprayed
2 cup sugar
6 tablespoons freshly squeezed lemon juice
4  large eggs, room temperature
1/4 cup flour
1/2 teaspoon baking powder
3 tablespoons (45g) melted unsalted butter

Optional: powdered sugar, for serving

Directions:
1. Preheat the oven to 350ºF (180ºC).

2. Overturn an 9X13-inch pan on the counter and wrap the outside snugly with foil, shiny side up. Remove the foil, turn the pan over, and fit the foil into the pan, pressing to nudge the foil into the corners. The smooth it as best you can.

3. In a medium bowl combine all the dry ingredients for the crust. Once combined add the melted butter and mix until combined.

4. Smooth the batter into the bottom of the pan, using your hands or a small offset spatula to get it as level as possible.

5. Bake the crust for 15- 20 minutes, or until it’s deep-golden brown.

6. While the crust is cooking, cut the lemon in half, remove the seeds, and cut the lemon into chunks.

7. Put the chunks of lemon in a food processor or blender along with the sugar and lemon juice, and let it run until the lemon is completely broken up. Add the eggs, flour, baking powder, and 3 tablespoons (45g) melted butter, and blend until smooth. (A few tiny bits of lemon pieces are fine if desired. I wanted mine nice and smooth.)

8. When the crust comes out of the oven, reduce the heat of the oven to 300ºF (150ºC). Pour the lemon filling over the hot crust and bake for 25 minutes or just until the filling stops jiggling and is barely set.

9. Remove from the oven and let cool completely. Once cool, carefully lift out the bars grasping the foil. Cut the bars into squares or rectangles. Sift powdered sugar over the top just before serving, if desired.

Storage: The bars will keep in an airtight container at room temperature up to three days. You can freeze the lemon bars as well for up to one month, letting them come to room temperature before serving.

Recipe Source: Adapted from David Lebovitz

Monday, June 25, 2012

Crémé Brûlée

I am on a dessert kick lately. I just can't help it! Desserts are by far my favorite things to make! I fell in love with Crémé Brûlée. I had it at a local restaurant and became slightly obsessed. I went out and bought a little crémé brûlée kit that had the ramekins, and the small little kitchen torch (my favorite part). I do slightly love fire, so when I say the torch is my favorite part I'm not really joking. I would have to be honest and say that the torch comes second only to eating the finished crémé brûlée. There are many recipes that call for straight cream in this recipe but I prefer using half cream and half milk. I don't feel like it compromises the flavor at all, but isn't quite as heavy or greasy feeling.


Crémé Brûlée
Total Time: 3 hr 30 min
Prep: 15 min
Inactive: 2 hr 15 min
Cook: 1 hr 0 min
Yield: 6 servings

Ingredients

  • 1 quart heavy cream (I prefer 2 cups heavy cream and 2 cups milk)
  • 1 vanilla bean, split and scraped
  • 1 cup vanilla sugar, divided
  • 6 large egg yolks
  • 2 quarts hot water

Directions

Preheat the oven to 325 degrees F. 


Place the cream, vanilla bean and its pulp into a medium saucepan set over medium-high heat and bring to a boil. Remove from the heat, cover and allow to sit for 15 minutes. Remove the vanilla bean and reserve for another use.


In a medium bowl, whisk together 1/2 cup sugar and the egg yolks until well blended and it just starts to lighten in color. Add the cream a little at a time, stirring continually. Pour the liquid into 6 (7 to 8-ounce) ramekins. Place the ramekins into a large cake pan or roasting pan. Pour enough hot water into the pan to come halfway up the sides of the ramekins. Bake just until the creme brulee is set, but still trembling in the center, approximately 40 to 45 minutes. Remove the ramekins from the roasting pan and refrigerate for at least 2 hours and up to 3 days.


Remove the creme brulee from the refrigerator for at least 30 minutes prior to browning the sugar on top. Divide the remaining 1/2 cup vanilla sugar equally among the 6 dishes and spread evenly on top. Using a torch, melt the sugar and form a crispy top. Allow the creme brulee to sit for at least 5 minutes before serving.  If you don't have a torch you can place them in the oven on broil but watch them very closely for they will burn very quickly.

Recipe Source: Adapted slightly from the Food Network


Monday, June 18, 2012

Reese's Pieces Rice Krispies Treats

A while ago a friend and I were talking about Rice Krispies treat. I kind of really enjoy them. She told me that she loves them with Reese's Pieces in them. Ever since that conversation I have been wanting to make them. I had never had them with Reese's Pieces in them, but I love Reese's Pieces so I figured how could I go wrong? Well after making them I really can say they might be my new favorite way to have Rice Krispies!


Reese's Pieces Rice Krispies Treats

Ingredients:

4 tbsp (56g) butter
5 cups (225g) mini-marshmallows
5 cups (152g) Rice Krispies cereal
1 cup Reese's Pieces candy

Directions:
Melt butter in a large sauce pan over low heat (don't try and speed up this process they will turn out better if you stick with the low heat). Add marshmallows to the melted butter. Continue cooking over low heat until the marshmallows are completely melted. Add Rice Krispies cereal and stir until marshmallow/butter mixture is evenly distributed. Add the the Reese's Pieces and stir gently until they are evenly distributed. Pour into a greased 9X13 inch buttered pan. With a buttered spatula or a piece of wax paper gently press mixture down into the pan until it is fill the pan and is mostly flat on top. If you desire you can sprinkle more Reese's Pieces on top and gently push down on them to get them to stick. Allow to cool approximately 10 minutes then cut into desired size pieces with a buttered spoon. Enjoy!

Thursday, June 7, 2012

Blueberry Sweet Rolls

 
There is a certain bakery near us that has the most amazing sweet rolls. People will often bring them for us at my work, or if it has been a while we will encourage our boss to get some on her way in. Everyone loves them. They have a wide variety of flavors including cinnamon, blueberry, raspberry, and orange. Yes I have tried them all, and no I can not pick a favorite. My favorite changes depending on my mood that day, but I can tell you that I always enjoy them. Well this week we found blueberries on sale at Winco. We of course had to get as many as possible. I was really in the mood for some sort of bread and decided that I could make blueberry sweet rolls just like the local bakery. I made them and was so glad that I did. I could have eaten the whole pan. Luckily (for my thighs) I refrained. But needless to say they are delicious!


Blueberry Sweet Rolls

Dough
5 1/4 c. white flour
1/4 c. sugar
1 1/2 tsp. salt
1 1/2 rounded tablespoons saf-instant yeast
3 T. oil
2c. hot tap water


Filling
2 cups blueberries
1/2 cup sugar
2 tbs flour
2 tsp lemon juice
3 tbs butter

Browned Butter Glaze
1/4 cup butter
2 cups powdered sugar
1-2 tbs milk
1 tsp vanilla

Directions:

Preheat the oven to 375 degrees. Line a jelly roll pan with tin foil or a silpat to help with the clean up process.

For the dough: Mix dry ingredients to bowl of stand mixer. Add oil and water. Mix for 1 minute and check consistency. If dough is too dry, add a little more water, if too wet add more flour. Dough should clean the bowl of the mixer. Mix for 5 minutes. (Do not add flour to the dough after it has finished mixing.) Let dough sit in the mixer for 10 minutes (set a timer if you are like me and most likely would forget about it). After the 10 minutes is up turn the mixer on for about 30 seconds then turn it back off again. Repeat the process of letting the dough rest/rise then turning on mixer 2 more times.  During the down time make the filling.

Filling: Combine all ingredients in a blender or food processor. Blend until fruit is blended down and more liquid. I like mine quite blended, but if you like more chunks feel free to only blend it a small amount or add fresh blueberries after the blending process is done. Pour blended blueberry mixture into a medium size sauce pan. Place the pan over medium heat. Heat until mixture thickens. Once thick take off heat and set aside to cool. It is ok if it is still warm, but you don't want it boiling hot when you spread it on the dough.

After the final resting and turning on the mixer process turn dough onto a well floured surface. Split the dough in half working with one half at a time. Roll out half of the dough into a rectangle. Spread filling on rolled out dough. I found that cutting the dough into long strips with a pizza cutter and then rolling it up was easier and less messy than rolling it up then cutting it, but you can do this step however you want. Place rolled up sweet rolls on prepared baking sheet. Allow about an inch in between pieces to allow for rising, but to still let them tough slightly once baking. Bake at 375 for 15-20 minutes or until dough is a light golden brown.


Browned Butter Glaze: Over medium heat heat butter until it is browned. (It starts turning a nice amber color and gives off the most delicious nutty smell) Pour browned butter into a heat proof bowl and add powdered sugar and milk. Mix with a whisk or hand mixer until combined. I like mine to be just slightly thinner than I would make it if I wanted it to be spreadable. Drizzle glaze over warm sweet rolls and enjoy!


Thursday, May 24, 2012

Chocolate Lava Cake

I love chocolate. I love love love this cake. I pretty much love everything that has to do with this cake. I love that each person gets their own individual cake. I love that they are rich and full of chocolate. But mostly I love that they are ooey gooey in the middle!

I know there are many recipes that call for egg yolks or egg whites. If I can find some that I can make on the same day that is wonderful, otherwise I hate it! I don't like wasting either the yolk or the white. Sometimes I will save them. Sometimes I will make scrambled eggs with whatever extras I have. And sometimes I find recipes like this that I can just use the whole egg instead!


Chocolate Lava Cake

Preparation Time: 15 minutes
Cooking Time: 10 minutes
Servings: 4

Ingredients:

6 oz. Semi-Sweet Baking Chocolate (or use your favorite 70% dark chocolate bar)
6 oz. Butter (diced, room temperature)
3 Eggs
1/2 cup Granulated Sugar
1/3 cup Flour
Butter for Ramekins


How to Make It:

Preheat oven to 350°F
1. Melt chocolate on low flame in a double boiler. When melted, take of flame, and…
2. Stir in diced butter, until it melts.
3. In another bowl, beat eggs and sugar, until it starts to whiten.
4. Stir in melted chocolate and then the flour.
5. Butter 4 individual ramekins well, and pour in chocolate batter.
6. Cook for about 10 minutes. (See tips below)
7. Tip ramekins upside down onto dessert plates and serve.
Voilà!

Tips:

You can definitely prepare your chocolate lave cake recipe ahead of time, and then bake 10 minutes before serving.

In terms of buttering the ramekins: butter the bottoms first, and then butter the sides, wiping from the bottom up to the top. It helps the chocolate to rise even more.

In terms of baking time… well, it depends on how runny you want it! I like it with a super-liquid-oozing center -- so do my guests! For this, you want the top to be cooked through, but the center to be liquid. You can check with a toothpick after 10 minutes of baking.
If you don't like liquid-center chocolate desserts, just cook for a little longer, and you will have an incredibly moist chocolate cake. So, either way, you can't go wrong!

Recipe Source: Famous French Desserts

Tuesday, April 24, 2012

Orange"ies"

I really don't know what to call these bad boys except delicious. Really they are like brownies but instead of chocolate they are orange flavored. They are dense and delicious with a little bit of orange heaven drizzled on top. I would call them Orange Brownies, but they aren't brown at all so I think this could a little misleading. So I'm sticking with the Orange"ies". It might sound funny but that is what I'm going with!

I made these for my sister-in-law's bridal shower. The shower was so cute and so fun. The picture is one straight from the shower taken with my good little phone. There were several recipes that I promised I would post so stay tuned for more yummy desserts in the near future.

*The original recipe is for Lemonies. I am sure these are just as delicious, I just happened to have oranges on hand so feel free to make whatever you have on hand.


Orange"ies" or Orange Brownies

3/4 cup all-purpose flour
3/4 cup granulated sugar
1/4 teaspoon salt
1/2 cup (1 stick) butter, softened
2 large eggs
2 1/2 teaspoons Orange zest
2 tablespoons Orange juice

Orange Glaze
1/2 cup powdered sugar
1 tablespoon Orange juice
2 teaspoons Orange zest

Preheat oven to 350°F. Spray an 8-by-8-inch baking dish with cooking spray and set aside.

Zest and juice one orange; set aside.

In the bowl of an electric mixture fitted with the paddle attachment, beat the flour, sugar, salt, and softened butter until combined.

In a separate bowl, whisk together the eggs, orange zest, and orange juice until combined. Pour into the flour mixture and beat at medium speed until smooth and creamy, about 2 minutes.

Pour into baking dish and bake for 25 minutes, or until just starting to turn golden around the edges and a toothpick inserted into the center of the brownies comes out clean. Allow to cool completely before glazing.

When brownies are cooled completely, make the glaze by whisking together all three ingredients. Spread over the brownies with a rubber spatula, cut into bars, and serve!

Recipe Source: Bakergirl

Thursday, March 29, 2012

Amish Friendship Bread

I must be on a bread making kick lately. I absolutely adore this bread. I have loved it since the first time my mom made it for us. If you have never heard of this bread will give you the brief story straight from Wikipedia:  

Amish Friendship Bread is a type of bread or cake made from a sourdough starter that is often shared in a manner similar to a chain letter. The starter is a substitute for baking yeast and can be used to make many kinds of yeast-based breads, shared with friends, or frozen for future use. The sweet, cake-like Amish Cinnamon Bread is a common bread that is made from this starter; it is a simple, stirred quick bread that includes a substantial amount of sugar and vegetable oil, with a mild cinnamon flavor. The recipe for Amish Cinnamon Bread may have first been posted to the internet in 1990, but the recipe itself is several decades old.

I'll be honest I'm not a fan of chain letters or any such thing. I'm sure some people love them, but I'm not one of those people. For this reason I found a way to get around this. Instead of making 4 batches of bread (8 loaves) every time I want this bread I realized that the starter is the same on the day that you get it or on day 10. So every once and a while I will go through the 10 day process of multiplying the starter. On day 10 instead of giving them away with a chain letter I stick them in the freezer. Then whenever I want some fresh cinnamon bread I pull out a bag and make the bread.

If you have never tried this bread I do feel that it is worth the time and effort it takes to make a start and make this bread. I love the sweet cinnamony flavor and the unique flavor that the start brings. If you are someone that likes the challenge of finding someone new to give this bread and starter to then feel free to be a good person and share this bread with friends and family, they will be glad you did!


Amish Friendship Bread Starter

Ingredients

1 (.25 ounce) package active dry yeast
1/4 cup warm water (110 degrees F/45 degrees C)
3 cups all-purpose flour, divided
3 cups white sugar, divided
3 cups milk

Directions
In a small bowl, dissolve yeast in water. Let stand 10 minutes. In a 2 quart container glass, plastic or ceramic container, combine 1 cup flour and 1 cup sugar. Mix thoroughly or flour will lump when milk is added. Slowly stir in 1 cup milk and dissolved yeast mixture. Cover loosely and let stand until bubbly. Consider this day 1 of the 10 day cycle. Leave loosely covered at room temperature.

On days 2 thru 4; stir starter with a spoon.

Day 5; stir in 1 cup flour, 1 cup sugar and 1 cup milk. Days 6 thru 9; stir only.

Day 10; stir in 1 cup flour, 1 cup sugar and 1 cup milk. Remove 1 cup to make your first bread, give 2 cups to friends along with this recipe, and your favorite Amish Bread recipe. Store the remaining 1 cup starter in a container in the refrigerator, or begin the 10 day process over again (beginning with step 2).


**Note: Once you have made the starter, you will consider it Day One, and thus ignore step 1 in this recipe and proceed with step 2. You can also freeze this starter in 1 cup measures for later use. Frozen starter will take at least 3 hours at room temperature to thaw before using.


Amish Friendship Bread


Ingredients:
1 cup oil
1/2 cup milk
3 eggs
1 tsp vanilla
2 cups flour
1 cup sugar
1-1/2 tsp baking powder
2 tsp cinnamon
1/2 tsp baking soda
1 - (5.1 oz) box instant vanilla pudding
1/2 tsp salt
1 cup nuts (optional)

Grease 2 bread pans well. Sprinkle cinnamon sugar into each bread pan and tip side to side to coat the bottom and edges (kind of like you are flouring your pans but using cinnamon sugar). In a small bowl combine oil, milk, eggs, and vanilla. Mix well. In a separate large bowl combine remaining ingredients and mix well. Add wet ingredients to the dry ingredients. Mix and pour into two well greased and cinnamon sugared bread pans. If you want even more cinnamon sugary goodness you can sprinkle some cinnamon sugar on top of the loaf prior to baking. Bake at 325 degrees for 1 hour. Cool on wire rack.

Recipe Source: Allrecipes

Tuesday, March 27, 2012

Homemade "Magic Shell" Ice Cream Topping

This lovely recipe is another great find on Pinterest. I am always looking for some great quick and easy ice cream toppers and this is definitely that. I have always loved magic shell topping. There is just something fun about it. When I saw how easy this was to make I just had to try it. We used unrefined virgin coconut oil which has a slightly stronger coconut flavor, but if you aren't a fan of coconut flavor you could try a refined coconut oil or butter. My husband said with the unrefined coconut oil it kinda reminded him of a Mounds or an Almond Joy.
 
Homemade "Magic Shell" Ice Cream Topping

All you need is:
1 1/4 Cups Chocolate Chips

1/2 Cup Coconut Oil (measured when solid)

Melt chocolate chips and coconut oil in the microwave about 1 minute (depending on your microwave). Allow to sit a few minutes to allow the heat of the oil to melt the chocolate chips and then stir until smooth. It will be runny.

Pour into a bottle. You could use a recycled pickle relish bottle. (We recommend a glass bottle if you’re gonna refrigerate and then heat.) 

Store in the refrigerator (though in the summer it’s likely to stay liquidy unrefrigerated). To serve, heat the glass bottle (open cap) in the microwave for 30 seconds until liquid. Stir and continue heating at 30 second intervals if not liquid after the first 30 seconds. Pour over your favorite ice cream and in a few seconds you will see magic!

Notes:
  • You can substitute butter for the coconut oil, however the coconut oil gives the more ‘real’ Magic Shell flavor.
  • You can use milk chocolate chips, but everyone we served preferred the semi-sweet chocolate chips
  Recipe Source: Alphamom

Saturday, March 24, 2012

Browned Butter Ice Cream

It is no secret that I love ice cream. I just think it is one of the most wonderful things ever! I mean really you can't go wrong with something cool and refreshing, but somehow makes you feel all warm and fuzzy inside. Ok maybe the warm and fuzzy inside is an exaggeration, but I really do love it that much! I am a huge fan of custards! Homemade ice creams can sometimes get icy or really hard once they have been in the freezer for a while. I have found that custards stay creamy and smooth even in the freezer. Yes they do harden more in the freezer but the texture is amazing. It is also no secret that I love browned butter. I found this recipe a while back and knew I had to try it. I actually did make it during my no sugar month. I made it with honey. It tasted pretty good, but I knew I had to try it as written. With honey it didn't quite have the carmely flavor that I was hoping for. This recipe as written is creamy and carmely and oh so delicious!


Brown Butter Ice Cream
8 Tbs butter
2 cups cream
1 cup milk
6 yolks
1 cup brown sugar
½ tsp salt
1 tsp vanilla

Directions
In a pan, melt the butter and continue cooking it over low heat until the butter browns. Meanwhile, bring the cream and milk and vanilla to a simmer.

In a mixer whisk together the eggs, brown sugar and salt until fluffy. Add the brown butter, a little bit at a time to the running mixer.  When they are combined, add the milk a little at a time until the whole mixture is frothy and smooth and well combined. Return it to a pan and put back on the stove over medium-low heat.  Cook on low until it thick enough to coat the back of a spoon.

Pour into a bowl and refrigerate until completely cool or up to overnight.

Run the custard through an ice cream maker according to the manufacturers directions.
Put the ice cream in a container and let it freeze at least 4 hours until firm.


Recipe Source: Heather Christo Cooks 

And here is my Photoshop fun picture for the day!

Sunday, March 11, 2012

Easy Peanut Butter Swirl Brownies

We have been moving this week (hence the lack of posts recently). It has been a busy and great week, but with moving that means lack of cooking supplies, pans, ovens, and Internet. This all means eating out for an entire week. We are finally in our new (actually its old) house and I know where almost all of my kitchen stuff is! To celebrate being in our house we to make some treats. Since I only know where most of my stuff is I decided to go easy. I decided to make peanut butter swirl brownies. They are easy, I had all of the supplies, and I adore chocolate and peanut butter anything! I thoroughly enjoyed them and I hope you will too!

(Our Camera is also in between houses so this one was taken with my phone. Thank heaven for camera phones)

Easy Peanut Butter Swirl Brownies

Ingredients

1 box(es) (19.8-ounce) brownie mix
1/2 cup(s) peanut butter
1/4 cup(s) confectioners' sugar
1 1/2 tablespoon(s) melted butter
1 large egg

Directions
Prepare brownie mix as label directs for 9" by 9" pan. In bowl, stir peanut butter, sugar, melted butter, and egg until smooth. Dollop peanut butter mixture onto brownie batter in pan; swirl with knife. Bake according to directions.


Recipe Source: Good Housekeeping 

Tuesday, March 6, 2012

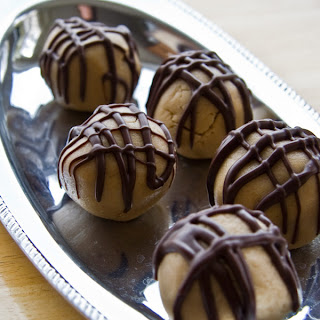
Cookie Dough Bites

I feel like this post doesn't require much of an introduction. There is a good chance that if you have been to this blog before you know that I love cookies, cookie dough, and pretty much anything that contains sugar. So obviously when I found this recipe I had to try it. I think these are absolutely delicious. I even had a friend tell me that she really liked them and she doesn't like cookie dough. They don't taste exactly like cookie dough but all in all it is pretty close. Happy Eating!

Cookie Dough Bites
Hands-On Time: 20 minutes
Ready In: 1 hour
Yield: 2 dozen cookies

Ingredients
    1 cup salted butter, softened
    1½ cups packed light brown sugar
    1 teaspoon vanilla extract
    2 cups flour
    6 ounces miniature chocolate chips
Directions

  1. Cream butter and sugar together.
  2. Add remaining ingredients and mix well -- use your hands to get it together the best.
  3. Roll into 1-inch balls.
  4. Refrigerate until firm, about 30 minutes. Dip in chocolate, drizzle with chocolate or eat as is -- equally delicious no matter what!
  5. Let stand at room temperature for about 10 minutes before serving.
  6. Store in the refrigerator. 
Recipe Source:Disney Family


Friday, March 2, 2012

Peanut Butter Eclair Cake

I absolutely love eclair cake. I don't exactly know why this cake is called eclair cake. I don't really like eclairs (gasp!) I know! I know! Who doesn't like eclairs? Well its not that I don't like them. I can eat them. They are ok, but if I'm going to eat something that is going to add inches to my waistline then I dang well better thoroughly enjoy it. I think this is a really good way to eat. I only eat desserts that I really really enjoy. Luckily for me someone invented eclair cake, and even better is the addition of peanut butter in this eclair cake. Warning - this cake is very rich. A good glass of milk or something to wash it down with is a good idea. Really though it is very delicious! I will definitely be making this recipe over and over again.


Peanut Butter Chocolate Éclair Cake

1 box chocolate graham crackers (I have also tried it with cinnamon which added a fun twist)
2 (3 1/4-ounce) boxes vanilla instant pudding (or use this homemade vanilla pudding recipe) *
1 cup peanut butter
3 1/2 cups milk (omit if using homemade vanilla pudding)
1 (8-ounce) container Cool Whip, thawed
1 can chocolate frosting

Spray the bottom of a 9x13 pan with cooking spray. Line the bottom of the pan with whole graham crackers. In bowl of an electric mixer, mix pudding with milk and peanut butter; beat at medium speed for 2 minutes. Fold in whipped topping. Pour half the pudding mixture over graham crackers. Place another layer of whole graham crackers on top of pudding layer. Pour over remaining half of pudding mixture and cover with another layer of graham crackers.

Heat the container of prepared frosting, uncovered in the microwave for 1 minute. Pour over the top of the cake. Refrigerate for at least 12 hours before serving.

*Note: I made this with homemade pudding and loved it! I love the taste of a good homemade pudding. For the ease of this recipe I kept the original instructions with the boxed vanilla. I have had many eclair cakes with the boxed vanilla pudding and it is great too. But if you are a little crazy (like myself) you can make your own vanilla pudding, and while you are at it you might as well whip up some homemade whipping cream to replace the cool whip. I promise if you do it will be well worth the work!

Recipe Source: Plain Chicken

Friday, February 24, 2012

Microwave Lemon Curd


So apparently I really enjoy lemon curd. I have realized lately that I' love citrus! I think I realize this every time I make something orangy or lemony. I really do love it. I know I have a couple recipes on here for lemon curd. I have my traditional lemon curd (which is fantastic), my healthier version (which is also quite good) and now I'm posting this quick and easy version. All are great. This one is probably the most tangy and sour of the 3 recipes, but I love it when I'm in a hurry. Who knew you could make lemon curd in the microwave? Well now I know and if you are reading this you now know as too! Now you might be asking yourself what would I use this lemon curd for. Let me answer that for you. I like to use it for the filling of cakes, on graham crackers, for lemon bars, you could make up little individual pie crusts and pour this on top to have little tarts, you could pour it over ice cream. Really you could do whatever your heart so desires and I'm sure it would be amazing.


Microwave Lemon Curd

Ingredients
1 cup white sugar
3 eggs
1 cup fresh lemon juice
3 lemons, zested
1/2 cup unsalted butter, melted


Directions
In a microwave-safe bowl, whisk together the sugar and eggs until smooth. Stir in lemon juice, lemon zest and butter. Cook in the microwave for one minute intervals, stirring after each minute until the mixture is thick enough to coat the back of a metal spoon. Remove from the microwave, and pour into small sterile jars. Store for up to three weeks in the refrigerator.

Tuesday, February 14, 2012

Cinnamon Roll Cake

Are you still trying to figure out what to make for Valentines Day? Well look no further my friends. This cake is so moist and delicious. It tastes just like a cinnamon roll but in cake form!


Cinnamon Roll Cake
Cake:
3 c. flour
1/4 tsp.salt
1 c. sugar
4 tsp. baking powder
1 1/2 c. milk
2 eggs
2 tsp. vanilla
1/2 c. butter, melted

Topping:
1 c. butter, softened
1 c. brown sugar
2 Tbsp. flour
1 Tbsp. cinnamon

Mix everything together except for the butter. Slowly stir in the melted butter and pour into a greased 9x13 pan. For the topping, mix all the ingredients together until well combined. Drop evenly over the batter and swirl with a knife. Bake at 350 for 28-32 minutes.

Glaze:
2 c. powdered sugar
5 Tbsp. milk
1 tsp. vanilla

While warm drizzle the glaze over the cake.

Recipe Courtesy of: Cookin' Up North

Friday, February 3, 2012

Cookies N Cream Oreo Fudge Brownies

I have officially not eaten sugar for one month and it has been great. I met my goal! Yeah for goals! What better sugar filled recipe to make to celebrate my eating sugar again than this one? Ok so maybe this isn't the only thing to celebrate my eating sugar again, I plan on celebrating (much to my waistline's disapproval) all week! A friend of mine told me about these delicious brownies someone brought her that used cookies and cream ice cream, and it had Oreos in the middle. I figured that recipe was a no brainer...of course it is going to be phenomenal! Honestly the only 2 desserts/sugary treat that I have really been thinking about and craving were some yummy browned butter chocolate chip cookies, and these brownies. I have been just dying to make them! So finally, to celebrate eating sugar again I decided to make these. Well let me tell you they are just as amazing as I had hoped! They are rich, chocolatey, ooey, gooey, and most importantly delicious!


Cookies ‘N Cream Oreo Fudge Brownies

1 box Brownie Mix
eggs & oil (as called for by the brownie mix)
1 heaping half cup (6 oz) Cookies & Cream ice cream
1/4 Cup hot fudge topping (chilled or room temp)
about 16 oreos

Preheat oven & spray an 8×8 baking dish generously with cooking spray. Combine brownie mix, eggs, and oil as directed on the back of the box, but do not add the water. Add ice cream and hot fudge to the brownie batter and stir to combine. Pour half of the brownie batter into the baking dish, layer with Oreos, then top with remaining batter. Bake for 40-50 minutes or as directed on the back of the box.


Recipe Source: Kevin & Amanda

Wednesday, January 25, 2012

Honey Caramel Sauce

I can't believe I have almost completed my month with no sugar! It hasn't been nearly as hard as I thought it was going to be (probably because I have been making recipes like this to satisfy my sweets need). It really has been great. I think I feel healthier than I did. It is also nice to have an excuse to not needlessly eat all sorts of junk food (although sometimes I really want to).

This caramel sauce was a great find! I was making the dessert for a friend get together and made everything using absolutely no cane sugar. I made my new favorite ice cream - agave sweetened chocolate ice cream, brownies (I'm still working on perfecting this one), and this caramel sauce.


Honey Caramel Sauce 
  • 1/2 cup heavy cream
  • 1-1/2 cups honey
  • 1 Tablespoon butter
  • 1 teaspoon vanilla
  • 1/8 teaspoon salt
Combine honey and cream in a heavy saucepan.  Cook stirring constantly over medium-high heat until it reaches 238°.   Take off the heat, stir in butter, vanilla and salt.   Cool slightly and serve warm, or refrigerate.  Microwave briefly to warm for serving. 

Recipe Source: Simply Cooking

Wednesday, January 18, 2012

Agave Sweetened Chocolate Ice Cream

For not eating sugar this month I think I am doing quite well at finding yummy dessert recipes! This one really has made my month! I think this might possibly be my new favorite ice cream! This ice cream is creamy and smooth and oh so chocolatey! You never would believe that there isn't any sugar in it! I don't care if I am eating sugar or not. This is not just an ice cream I am going to eat while I'm not eating sugar. This ice cream is going to be a regular in my ice cream making schedule (yes I do believe that ice cream should be made on a regular schedule).


Agave-Sweetened Chocolate Ice Cream
About 1 quart (1 liter)

Since the custard is made without sugar, keep an eye on things as it will cook rather quickly. You can use a bowl set over a pan of simmering water, to avoid overcooking if you’ve never made a custard before. And because I don’t like washing dishes, I use the same saucepan for cooking the custard that I used for dissolving and blooming the cocoa powder, I simply scrape it as clean as possible and use it again for making the custard.

If you’re concerned about the quantity of agave nectar here, you can reduce the amount to ½ cup (120 ml) if you wish, although it’s texture and taste is exactly right for me. I have also tried it with honey and it works just perfectly!

10 tablespoons (155 ml) agave nectar (also works great with honey)
2 ounces (55 g) unsweetened chocolate, very finely chopped
1/3 cup (35 g) unsweetened cocoa powder
3 cups (750 ml) half-and-half, divided
5 large egg yolks*
pinch of salt

1. In a small saucepan, warm the agave syrup with the unsweetened chocolate over the lowest heat possible, stirring constantly, until the chocolate is melted. I have also done this step in the microwave and it worked great. Remove from heat and transfer mixtures to a large bowl. Set aside.

2. In a medium saucepan, add 1½ cups (375 ml) of the half-and-half and whisk in the cocoa powder. Cook over moderate heat until the mixture begins to bubble, then simmer for 30 seconds, whisking frequently, making sure to break up any clumps of cocoa powder.

3. Remove from heat and scrape the mixture into the bowl with the chocolate-agave mixture. Stir them together, then set a mesh strainer over the top.

4. Add the remaining half-and-half to the saucepan with a pinch of salt, turn on the heat, and when warm, slowly pour the warm half-and-half into the yolks whisking constantly, then pour the warmed yolks back into the saucepan.

5. Cook, stirring constantly over moderate heat, until the mixture becomes steamy and thickens. If using an instant-read thermometer, it should read about 170F degrees. (76C).

6. Pour the mixture through the strainer into the chocolate mixture.

7. Stir, then let cool a few minutes until tepid. Once it’s not super hot, whiz the mixture in a blender for ten seconds until it’s smooth and velvety. (Never blend very hot liquids in a blender, since it creates a hot vortex and can cause the liquid to blast out of the top.)

8. Chill thoroughly in the refrigerator, then freeze in your ice cream maker according to the manufacturer’s instructions.

*To save on eggs I have also tried this with using 3 whole eggs instead of 5 egg yolks. I felt like the taste wasn't too different and I didn't have left over egg whites.

Recipe Source: David Lebovitz